There are so many variables when growing cannabis and yellowing leaves can be caused by lots of different issues from watering problems to pests and fungi. In this article, you'll learn about the main causes, including over or underwatering, pH issues, nutrient lockout, light burn, temperature issues, root rot, pests, fungi, and Leaf Septoria.
What do yellow cannabis leaves mean?
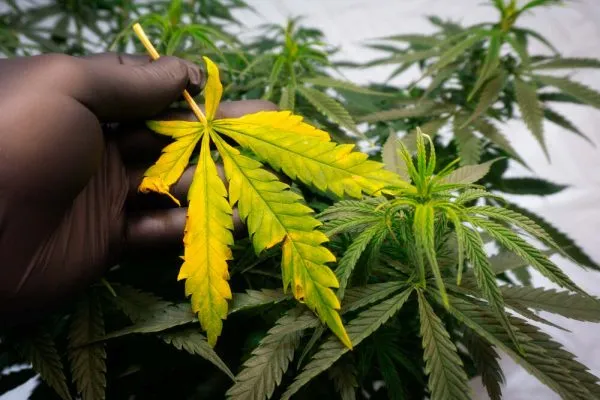
Yellow cannabis leaves are your cannabis plants way of telling you something is wrong and that the plant is experiencing stress. If not resolved early on this will limit the amount of light the plant is able to absorb and can eventually stunt growth. Act early though and you might be able to fix the issue in just a few short days. The main causes are normally nutrient deficiencies, improper watering, temperature issues or pest infestations. For a novice it can be difficult to identify the exact cause, but don’t worry, that is why we’re here to help. There are subtle differences between each problem that should help you pinpoint where you might have gone wrong.
Over or under watering

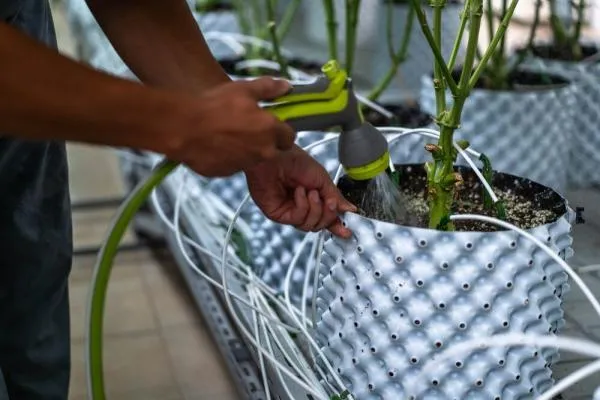
If you give your cannabis plants too much water, it can suffocate the roots and prevent them from taking on oxygen which eventually leads to root rot. On the flipside if they receive too little water, they won’t be able to absorb enough nutrients, which can also cause the leaves to yellow. Watering cannabis plants is a bit of a balancing act and its really important to learn how to properly water your plants. A simple rule of thumb is to feel the top 3-5cm of soil. If its dry then they could probably do with watering, if it is moist then leave them and check again the following day.
What to look for:
The leaves of your plants will start to droop slightly. Feel the top layer of soil—if it is very dry, they are probably underwatered; if the soil is damp, they are likely overwatered.
How to fix:
To fix overwatering, make sure your pots are draining properly drainage and reduce watering your plants. You need to make sure the soil is drying out enough between waterings to prevent root rot. If you suspect you have underwatered your plants, you need to give them more water or water them more frequently. Using a moisture meter can help you to maintain the perfect soil moisture levels.
pH issues or nutrient lockout
pH related nutrient blocking (nutrient lockout) occurs if the pH level in your soil is either too high or too low. When pH levels are not in the right range it prevents your plants from absorbing its nutrients and eventually causes excess nutrients and salts to build up in the soil. Before this problem becomes serious your leaves will begin to turn yellow, so catch this early and you can fix it.
What to look for:
Check the leaves for yellowing starting at the tips and edges. If your plants appear healthy but still exhibit yellowing, test the soil's pH. A pH imbalance often causes nutrient deficiencies, despite regular feeding.
How to fix:
To fix pH issues, test the soil's pH and adjust it to the ideal range of 6.0 to 7.0. Use pH adjusters like pH up or pH down to correct the levels. For nutrient lockout, flush the soil with clean, pH-balanced water to remove excess salts and restore nutrient uptake.
Over or under feeding
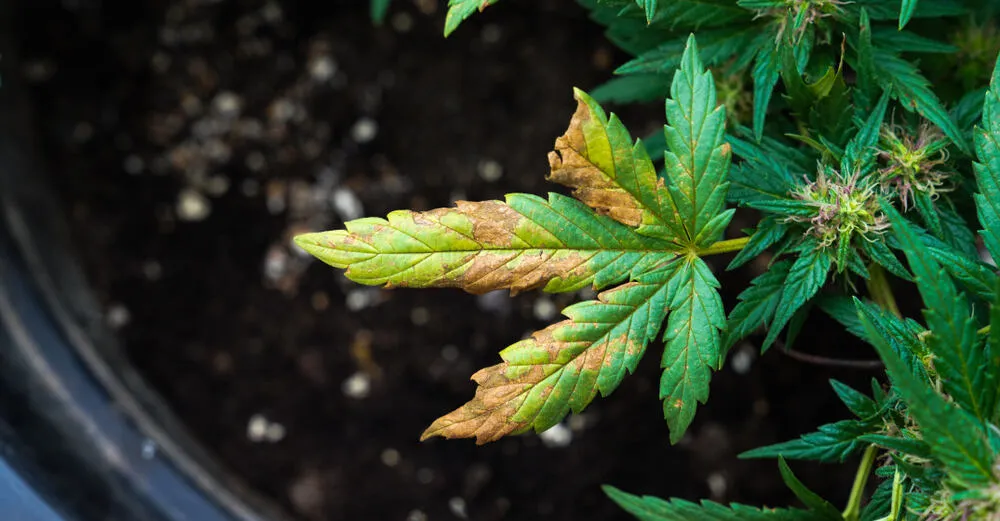
Overfeeding your cannabis plants can lead to nutrient burn, which causes the tips of your plants leaves to turn yellow or they can sometimes look as though they have burnt. Underfeeding, on the other hand, causes a lack of vital nutrients, which can cause the overall leaf to turn yellow.
What to look for:
Look for yellow leaves with burnt tips (overfeeding) or overall pale yellowing (underfeeding). Overfed plants might also show nutrient burn signs like brown spots, while underfed plants will appear weak and stunted.
How to fix:
If you suspect that your plants are suffering from over feeding you need to flush the soil with clean, pH-balanced water to remove any excess nutrients. This will help to reset the nutrient levels in the soil. If underfeeding is the issue you need to gradually increase the nutrient dosage over the next few waterings. Keep a close eye on how your plants respond and adjust feeding as necessary.
Light burn
Light burn is usually caused when your cannabis plants are placed too close to your grow lights. This causes the leaves to turn yellow or develop burnt spots.
What to look for:
Observe the top leaves closest to the light source. If they are turning yellow or starting to develop burnt edges, your lights are either too powerful or too close to your plants. If it is just the leaves at the top of the plant closest to the lights that are displaying these signs while the lower leaves are still green, there is a good chance this is the issue.
How to fix:
To fix light burn, adjust the distance between the grow lights and the plants, keeping the lights further away from your plants. Alternatively, if your lights have a setting that allows this you can reduce the light intensity. Gradually acclimate plants to stronger light sources to avoid shock and burn. Another simple trick, although this should be done in the veg stage only and not flowering is to use a ScrOG net to prevent your plants from growing too tall. This also increases light distribution which will give you bigger overall yields.
Temperature issues
Extreme temperatures, either too high or too low, will stress your plants and disrupt their metabolic processes; one of the signs of this is yellowing leaves.
What to look for:
Check for curling leaves, yellowing, and slow growth. If it is too hot for your plants this will cause leaves to yellow and curl up, while if it is too cold, they can turn a light yellow and start to droop.
Too hot
Excessive heat can cause cannabis leaves to turn yellow. High temperatures stress the plants, causing them to lose moisture rapidly and hindering their ability to photosynthesize effectively.
How to fix:
Fixing heat stress issues is relatively straight forwards for indoor growers but can be a bit trickier if your plants are being grown outdoors.
How to fix:
Indoors: To fix indoor temperature issues get yourself a thermometer and try to maintain a stable environment in your grow room> Try to keep between the range of 70-85°F (20-29°C) during the day and slightly cooler at night. Use fans, air conditioning, or heaters to regulate the temperature. Make sure you have good ventilation to prevent heat buildup.
Outdoors: If you are growing outside, most of what works for indoor grows will not work for you. Instead try to follow these steps:
- Water your plants in the evening to avoid water evaporating and burning the leaves.
- If the heat is causing stress you need to do whatever you can to reduce the temperature for your plants, so try to find a way to increase shade during the hottest parts of the day – to do this you can either move them into a shaded area or put up a sun sail. Don’t worry about them not getting as much direct sunlight, the key is to help them survive.
- You can try adding some seaweed kelp extract to your fertilizer. This will help to protect the roots against heat exhaustion.
- Think about what material of pots you use. Ceramic pots are great because they are nice and thick and help to regulate the temperature of your soil in extreme heat, protecting your roots.
Too cold
When the temperature drops too low, the plant's metabolic processes slow down, leading to nutrient uptake issues which causes the leaves to begin to yellow and droop.
How to fix:
To fix cold issues, use heaters or heat mats to raise the temperature in the grow area. Keep a thermometer in your grow room and try to keep the temperature within the ideal range of 70-85°F (20-29°C) during the day and does not drop below 60°F (15°C) at night. Insulate the grow space so that it retains more heat and avoid placing your plants near drafty windows or doors. If you live somewhere that is always cold, it could be worth using HID lights instead of LED as they naturally give off more heat.
Root rot
The main cause of root rot is overwatering, which causes pools of water to stagnate and prevent oxygen from getting to the roots eventually leading to decay and fungal growth.
What to look for:
Look for yellowing leaves paired with a rotting smell from the soil. Roots may appear brown and mushy instead of white and firm. Plants may also start to wilt despite sufficient watering.
How to fix:
Fixing root rot isn’t easy and the stress involved with the rot itself and what is required to fix the issue can kill cannabis plants. To fix root rot, you will need to remove the plant from its container and gently wash the roots to remove any dead or decayed material. Be careful and try not to damage too much of the roots. Prune away any severely damaged roots with sterilized scissors then repot your cannabis plant in fresh, well-draining soil, and make sure the new container has adequate drainage holes. Reduce how often you water your plants and make sure the soil has dried out between waterings. Adding beneficial microbes or fungicides to the soil can help prevent further fungal growth. You can also add amendments such as perlite to your soil to improve drainage.
Pests and fungi
Common pests like spider mites, aphids, and whiteflies, along with fungal infections like powdery mildew, disrupt the plant's health and nutrient absorption, causing your leaves to turn yellow.
What to look for:
Inspect your plants leaves for small insects, webbing, or fungal spots. Yellow leaves with tiny dots or spots and visible pests like spider mites or whiteflies indicate pest issues. Fungal infections often show as white powdery patches.
How to fix:
To fix cannabis pest issues, inspect the plants regularly and use organic insecticidal soap or neem oil to treat infestations. You can also introduce beneficial insects like ladybugs or predatory mites to help control the pest populations naturally. For fungal infections, you will need to remove, and discard affected leaves ASAP. Fungal infections spread incredibly fast, and it is sometimes too late to save a plant unless it is caught early. To avoid any fungal infections, make sure your grow room has good air circulation, and keep the humidity between 40-60% during flowering. You can also apply fungicides or natural remedies like a mixture of water and baking soda to combat fungal growth.
Leaf Septoria
Leaf Septoria, also known as yellow leaf spot, is a fungal disease that causes yellow spots to develop on cannabis leaves. It typically thrives in warm, humid conditions and can spread very fast if not addressed quickly.
What to look for:
Check your cannabis plants for circular yellow spots with dark centers on the lower leaves. These spots can spread quickly, leading to widespread yellowing. The fungus typically starts on the lower leaves and moves upward.
How to fix:
To fix Leaf Septoria, remove and dispose of any infected leaves to prevent the spread of the fungus. Improve air circulation and reduce humidity in the grow area by using fans and dehumidifiers. You should also make sure when you water your plants you water directly onto the soil and not the leaves – keeping the leaves dry will reduce the risk of the infection spreading. Apply a fungicide specifically designed for leaf spot diseases or use natural remedies like a diluted solution of neem oil or a baking soda spray. It is generally good practice to also maintain a good amount of spacing between pots in your grow room to ensure good airflow between the plants.
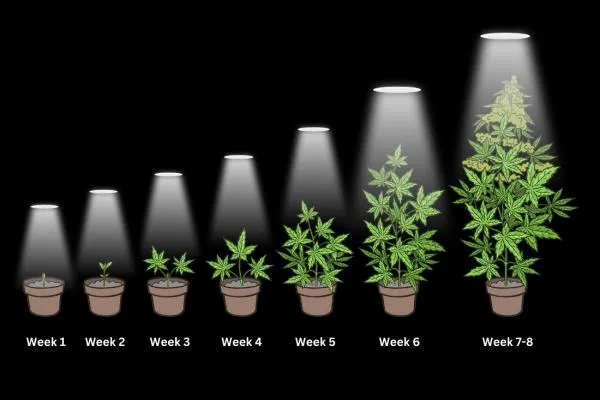
It is normal for leaves to turn yellow at the mid-end of flowering stage
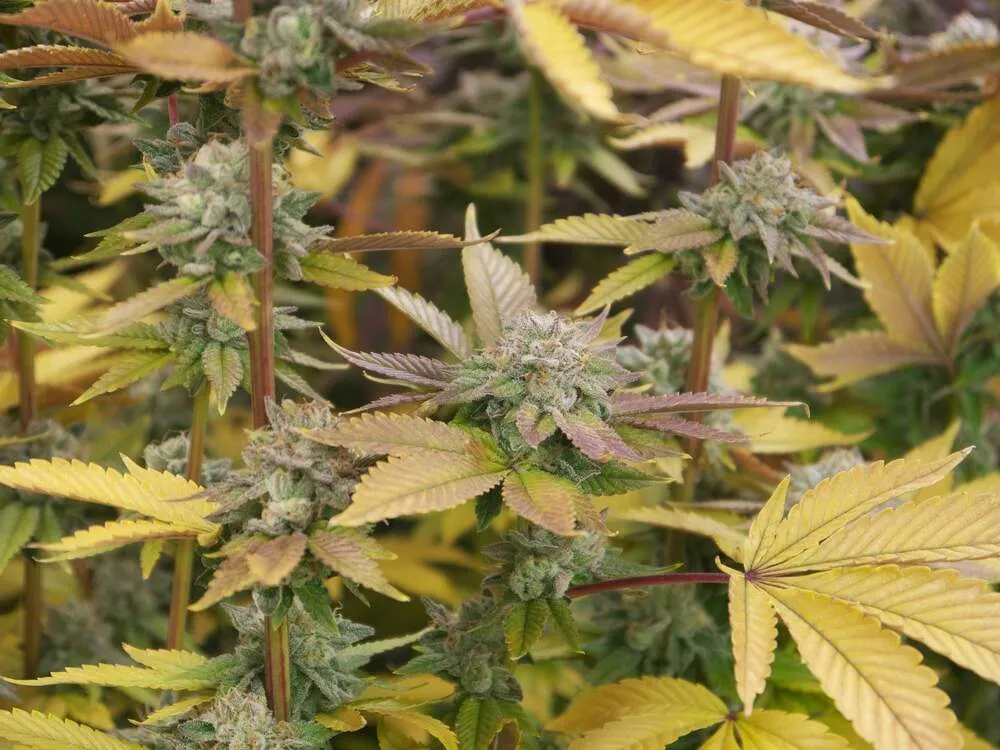
During the flowering stage cannabis plants begin to switch their focus to producing more buds. This causes the leaves of the plant to gradually turn yellow but you don't need to worry as this is completely natural. You should begin to see older or lower leaves turn yellow and begin to fall off while the buds will continue to develop and swell. This is a normal part of the plant's life cycle and simply helps the plant to produce even bigger buds.
Keeping your cannabis leaves green and healthy isn't rocket science, but it does take a bit of know-how. If you found these tips helpful, give your plants (and us) some love by liking and sharing this article!