Growing an autoflowering cannabis plant can seem like a complex task, but with a week-by-week guide, you'll find it more manageable. This article will break down the entire growth cycle into precise stages, from germination to harvest, providing you with essential insights and guidance. Week by week, you'll learn how to nurture your plant through seedling stages, vegetative growth, and flowering periods, all the way to reaping the rich rewards. Whether you're a novice or seasoned grower, understanding these stages can significantly enhance your success rate, making your cultivation experience efficient, enjoyable, and fruitful. Let's explore this fascinating process together.
- What you need to know about autoflowers before you start growing?
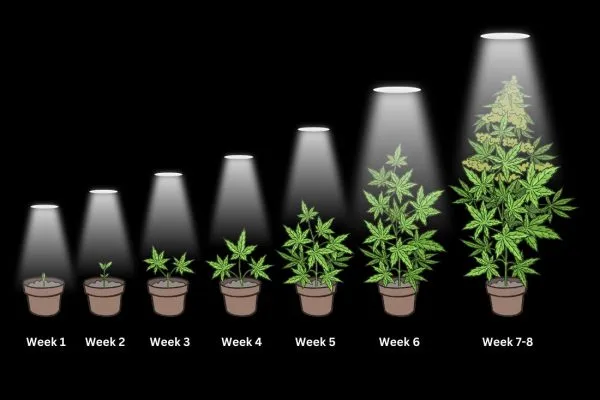
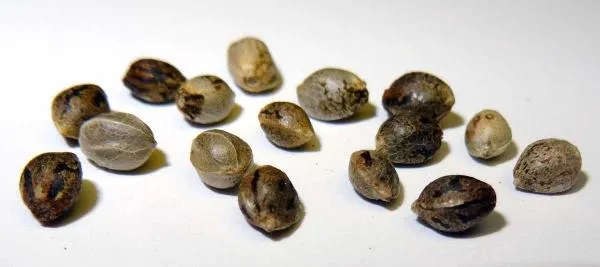
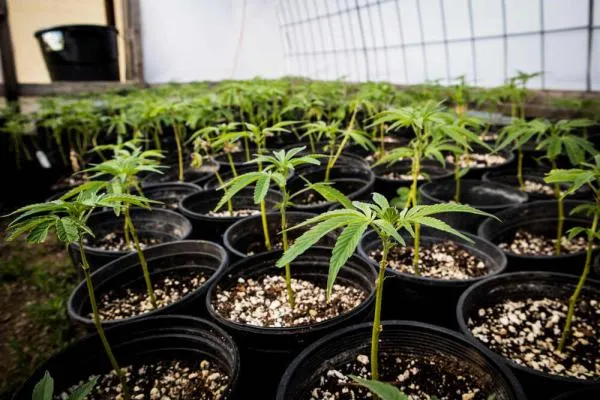
- Week 1: Germination and Seedling
- Week 2 - 3: End of Seedling Stage & Start of Veg Stage
- Week 3 - 4: Autoflower Vegetative Stage
- Week 4 - 5: Late Vegetative Stage
- Week 5 - 6: Early Flowering Stage
- Week 6 - 7: Flowering Stage
- Week 8 - 9: Late Flowering Stage and Harvest Time
- What makes autoflowers unique?
- FAQs
- Conclusion
What you need to know about autoflowers before you start growing?
- Autoflower seeds flower based on age within 3-4 weeks of growth and do not require a light cycle change to start flowering.
- You can grow autos on any light cycle - We recommend either 18/6 or 20/4 as this provides lots of light and enough time for your plants to recover.
- Autoflowers grow to a height of 60cm to 120cm tall, don't be concerned if your autos do not grow tall, they are naturally much shorter than photoperiods and yield around 50-100g per plant.
- Because autoflowers are much smaller than photoperiods you need to be careful with your nutrients giving them a lot less and a nutrient schedule that matches their shorter growth cycle.
- Because autoflowers flower within 3-4 weeks they only have a few short weeks of vegetative growth. During this time be careful with your plants anything that could cause stress in the lead up to the flowering stage.
Week 1: Germination and Seedling
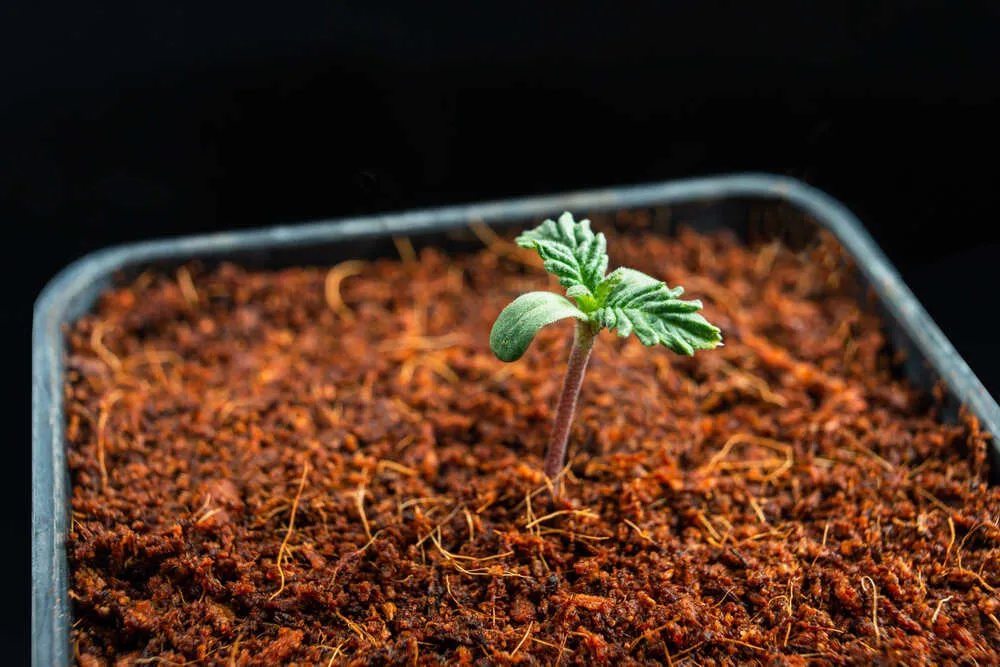
How The Plant Looks
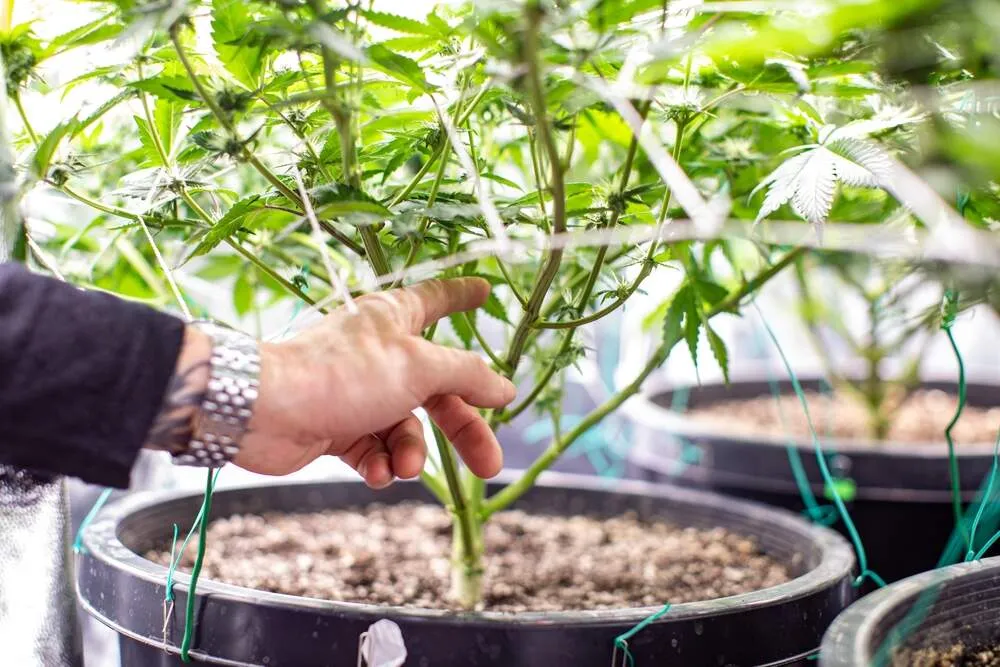
During the first week, your autoflowering plant will be in its early stages of development. The seed will germinate, and a small seedling will emerge with a pair of embryonic leaves, known as cotyledons. The plant is delicate and vulnerable at this stage. It is important to note that with autoflowers it is always best to plant them in their final growing pot from day 1. By this I mean you should avoid transplanting autoflowers into incrementally bigger pots as you might when you grow normal photoperiod seeds. This is because transplanting can stress a plant, and with the life cycle of autoflowering plants being so short, any amount of stress can have a negetive impact on the end result, i.e. The yield.
Major Developments
- Germination: When you germinate your autoflower seeds they will crack open, and a small white taproot will emerge.
- Cotyledons: The first pair of round-shaped cotyledon leaves will become visible, providing the initial energy for the seedling.
Caring for your plant:
- Maintain humidity: Keep the humidity levels high (around 70-80%) to support the delicate seedling's growth.
- Gentle watering: Use a spray bottle or a gentle watering method to avoid disturbing the young seedling.
- Light: Provide a light source, such as a fluorescent or LED light, that emits a gentle spectrum suitable for seedling growth.
Watch Out For
- Damping off: Be cautious of overwatering. Excessive moisture can lead to damping off, a fungal disease that can kill the seedling.
- Temperature fluctuations: Protect the seedling from drastic temperature changes, as it can stress the young plant.
Nutrients
- No nutrients needed: At this stage, the seedling only requires the nutrients present in the seed. Avoid using any additional nutrients during Week 1 as this will likely kill your plant.
Things Not To Do
- Avoid providing too much water or using strong nutrient solutions, as it may harm the delicate seedling.
- Don't expose the seedling to harsh lighting conditions or extreme temperatures.
Week 2 - 3: End of Seedling Stage & Start of Veg Stage
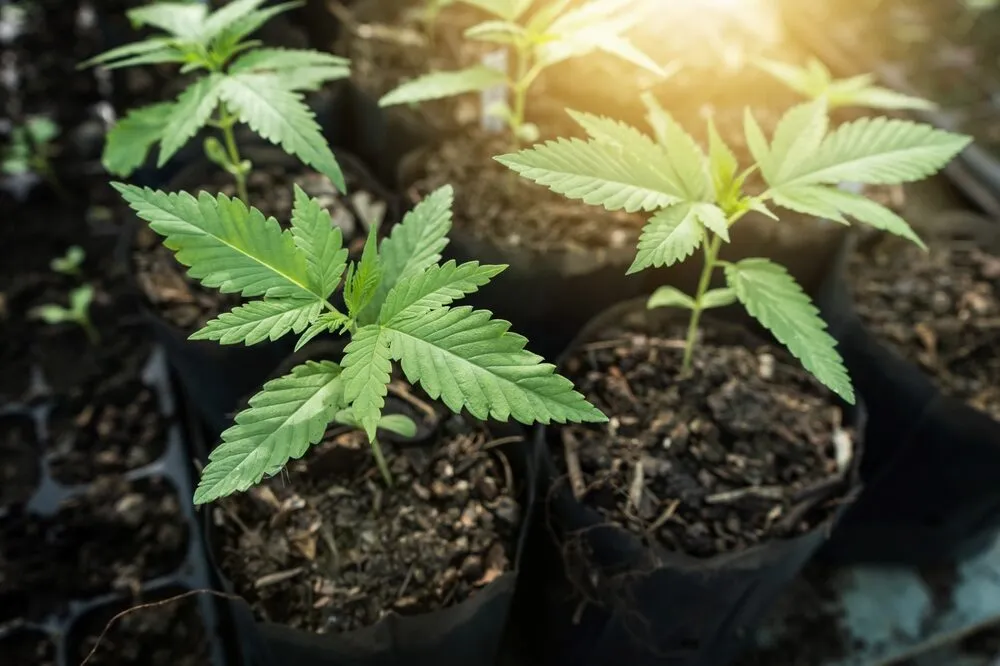
How The Plant Looks
By the end of Week 2, the seedling will have developed more leaves and established a stronger root system. It will start to display its first true set of serrated leaves. By Week 3, the plant will transition from the seedling stage to the vegetative stage, exhibiting increased growth and development.
Major Developments
- Growth of true leaves: The seedling will produce its first set of true leaves with serrated edges, replacing the initial cotyledons.
- Height increase: The plant will experience a noticeable growth spurt, becoming more robust and bushier.
Caring For Your Plant
- Light cycle: Continue providing 18-24 hours of light per day. Autoflowers thrive under 18 hours of light during the vegetative stage, but some growers opt for 20 hours of light and 4 hours of dark. There is no need to change light cycles with autoflowering plants so the 18/6 or 20/4 light cycle can be used right the way through from seedling to harvest.
Watch Out For
- Nutrient deficiencies: Keep an eye on the leaves for any signs of nutrient deficiencies, such as yellowing or spotting, and address them accordingly.
- Overwatering: As the plant grows, adjust the watering schedule accordingly to prevent overwatering but as a rule of thumb give the soil a quick feel and only water if the top layer is dry to the touch.
Nutrients
- Mild nutrients: During the vegetative stage, the autoflower will benefit from a balanced, mild nutrient solution designed for autoflower growth. Follow the manufacturer's recommended dosage guidelines.
Things Not To Do
- Avoid abruptly changing light cycles, as it can stress the plant.
- Do not over-prune or stress the plant during this stage, as it is still delicate despite its growth spurt.
Week 3 - 4: Autoflower Vegetative Stage
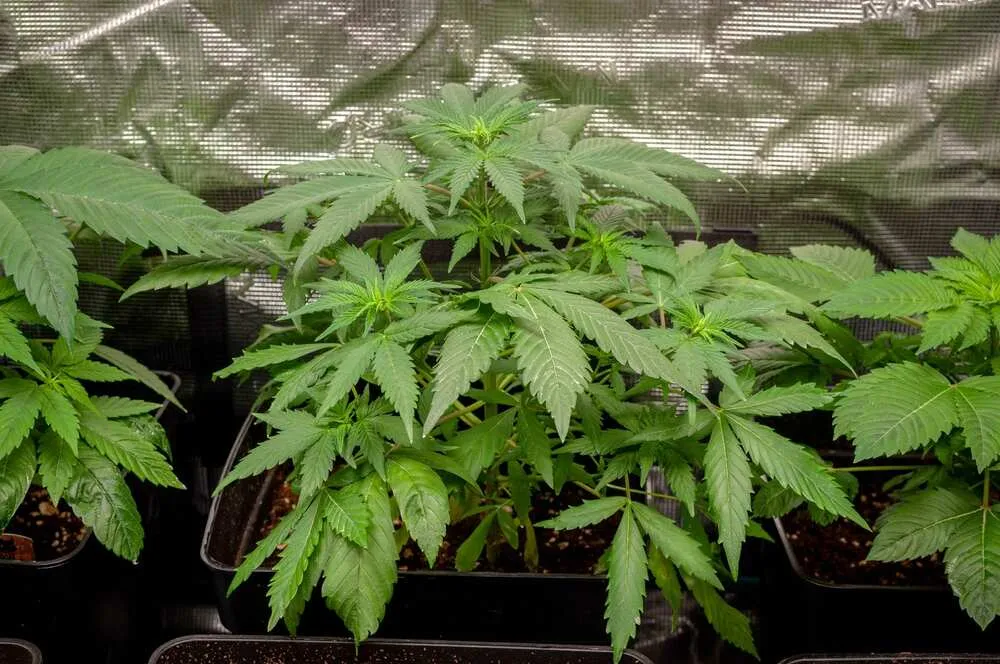
How The Plant Looks
During Weeks 3 and 4 of the vegetative stage, the autoflowering cannabis plant will continue to grow taller and bushier. It will develop multiple sets of serrated leaves, and the internodal spacing will become more pronounced as new growth emerges.
Major Developments
- Increased foliage: The plant will have more sets of leaves, contributing to its overall growth and photosynthetic capacity.
- Pre-flowering signs: Towards the end of Week 4, you may notice the first signs of pre-flowering, where small white pistils emerge at the nodes, indicating the onset of the flowering stage.
Caring For Your Plant
- Pruning and training: Consider light pruning or low-stress training techniques, like tying down branches, to promote an even canopy and better light penetration.
- Nutrient feeding: Provide a balanced and slightly higher concentration of nutrients during this stage to support the plant's increased growth.
Watch Out For
- Height management: Autoflowers can grow rapidly, so monitor their height and adjust the light source accordingly to prevent light burn or excessive stretching.
- Nutrient burn: Be cautious not to overfeed the plant, as excessive nutrients can lead to nutrient burn, which manifests as yellow or brown tips on the leaves.
Nutrients
- Moderate nutrients: Increase the nutrient dosage gradually, but avoid overfeeding. Use a balanced fertilizer designed for the vegetative phase and follow the manufacturer's instructions.
Things Not To Do
- Avoid drastic defoliation or high-stress training methods during this stage, as the autoflower may not have enough recovery time before flowering.
- Do not neglect environmental factors like temperature and humidity, as they can influence the plant's health and growth.
Week 4 - 5: Late Vegetative Stage
How The Plant Looks
By Week 4 of the late vegetative stage, the autoflowering cannabis plant will have developed a substantial number of leaves and branches. It will continue to grow taller and fuller, preparing for the transition to the flowering stage.
Major Developments
- Height and bushiness: The plant will continue to exhibit vertical growth and an increase in lateral branching, resulting in a bushier appearance.
- Pre-flowering progress: The pre-flowering signs observed in the previous week will become more prominent as more white pistils emerge.
Caring For Your Plant:
- Continue pruning and training: Regularly remove any large fan leaves that are blocking light to the lower parts of the plant. Consider further low-stress training to open up the canopy and promote even bud development.
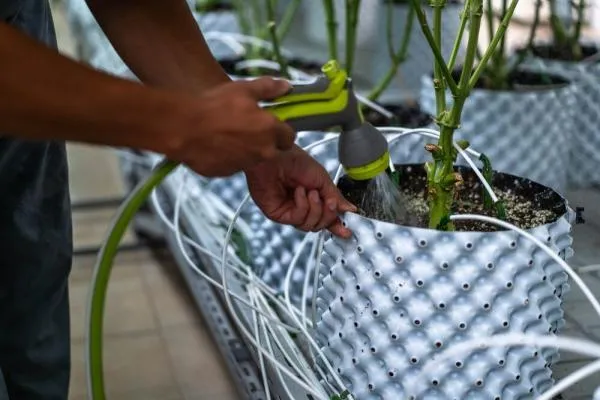
- Watering and humidity: Be attentive to the plant's water needs, ensuring it receives sufficient moisture without being overwatered. Maintain moderate humidity levels to prevent mold and mildew issues.
Watch Out For
- Stretching: Autoflowers can stretch significantly during this stage, so monitor the distance between nodes and adjust the light source to prevent excessive stretching and leggy growth.
- Light intensity: Ensure that the plant receives enough light intensity to support healthy growth and prevent weak, elongated stems.
Nutrients
- Continue with moderate nutrients: The plant's nutrient requirements remain similar to the previous week. Stick to a balanced fertilizer with slightly higher phosphorus levels to promote flower development.
Things Not To Do
- Avoid heavy defoliation, especially in the later part of this stage, as it may stress the plant before it transitions to flowering.
- Do not introduce significant changes to the plant's environment, such as moving it to a different location or altering the light schedule, as it can disturb the plant's growth rhythm.
Week 5 - 6: Early Flowering Stage
How the plant looks
During Weeks 5 and 6, the autoflowering cannabis plant will undergo a dramatic transformation as it enters the early flowering stage. It will cease vegetative growth and focus its energy on producing buds. The plant will start developing small flower clusters at the nodes.
Major Developments
- Flowering initiation: The plant will show distinct signs of flowering, with small bud sites forming at the nodes where the pre-flower pistils were previously visible.
- Stretching: Some strains may experience a final stretch during the early flowering stage, causing the plant to increase in height for a short period.
Caring For Your Plant
- Nutrient shift: Switch to a bloom-specific nutrient formula with higher potassium and phosphorus levels to support flower development.
- Support for buds: As the plant develops buds, consider using small stakes or ties to support the weight of the developing flowers.
Watch out for
- Nutrient imbalances: Keep a close eye on nutrient intake, as nutrient imbalances can lead to deficiencies or toxicities during this critical stage.
- Pest and disease prevention: Early flowering is a vulnerable time for the plant, so be vigilant in preventing pest infestations and disease outbreaks.
Nutrients
- Increase bloom nutrients: Gradually increase the dosage of bloom nutrients while monitoring the plant's response. Follow the nutrient manufacturer's guidelines and be cautious not to overfeed.
Things not to do
- Avoid light interruptions during the 12-hour dark period, as it can disrupt the flowering process and stress the plant.
- Do not use heavy pruning or high-stress training methods at this stage, as the plant needs to focus its energy on bud development.
Week 6 - 7: Flowering Stage
How the plant looks
During Weeks 6 and 7, the autoflowering cannabis plant will be fully immersed in the flowering stage. It will have stopped growing taller and will focus entirely on bud development. The plant will be covered with dense clusters of flowers, and resin production will be in full swing.
Major Developments
- Bud development: The buds will continue to grow and expand, becoming more substantial and resinous as they mature.
- Pistil and trichome production: The pistils (tiny hairs) on the buds will change color, and trichomes (resin glands) will become more prominent, indicating cannabinoid production.
Caring For Your Plant
- Watch humidity levels: As the plant becomes laden with buds, monitor humidity to prevent mold growth in the dense flower clusters.
- Air circulation: Ensure good air circulation around the buds to reduce the risk of mold and improve resin production.
- Watering: Adjust the watering schedule based on the plant's needs and environmental conditions. Be mindful not to overwater, as it can lead to bud rot.
Watch out for
- bud rot: Check the buds regularly for signs of mold or bud rot, especially in dense or humid environments. Remove any affected buds immediately to prevent it from spreading.
- Nutrient lockout: Be cautious with nutrient dosages, as excessive nutrients can lead to nutrient lockout, where the plant is unable to absorb essential nutrients properly.
Nutrients
- Continue bloom nutrients: Maintain the use of bloom-specific nutrients, as the plant requires a higher concentration of phosphorus and potassium during this stage.
Things not to do
- Avoid handling the buds excessively, as the resinous trichomes are delicate and can be easily damaged, reducing the final product's quality.
- Do not introduce new nutrients or supplements abruptly, as it can disrupt the plant's natural nutrient uptake and affect the taste and potency of the buds.
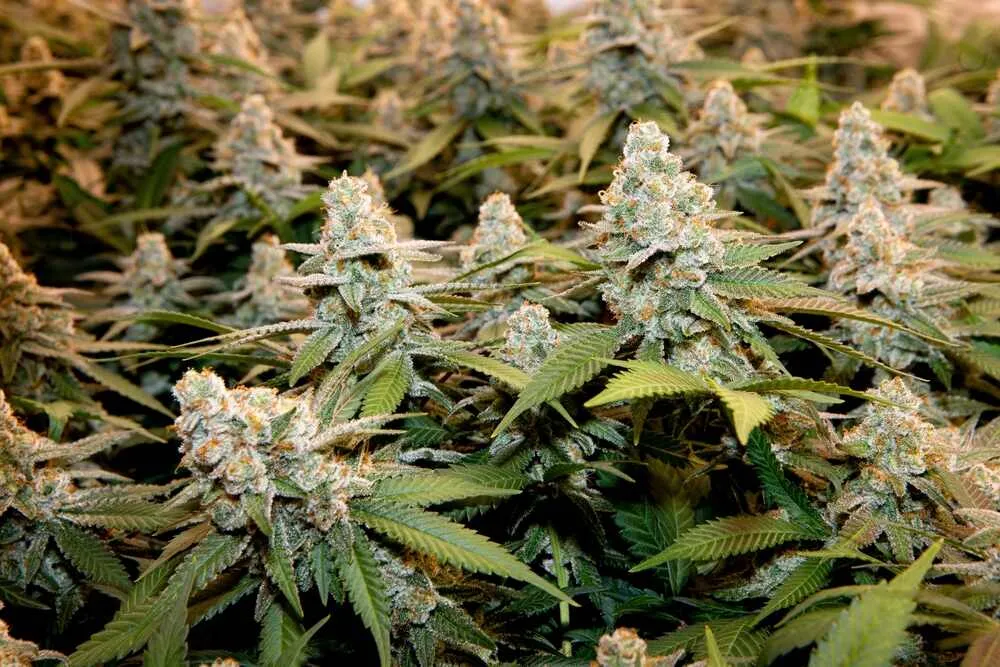
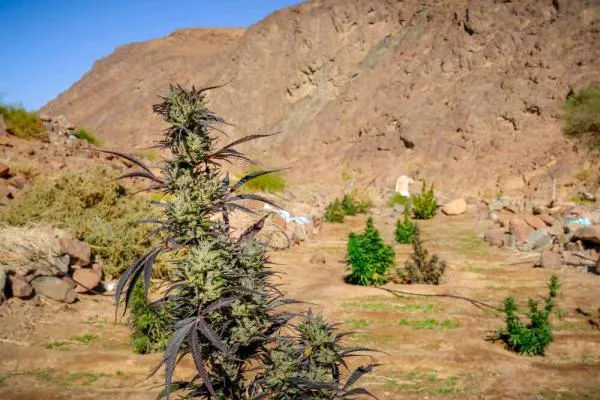
Week 8 - 9: Late Flowering Stage and Harvest Time
How the plant looks
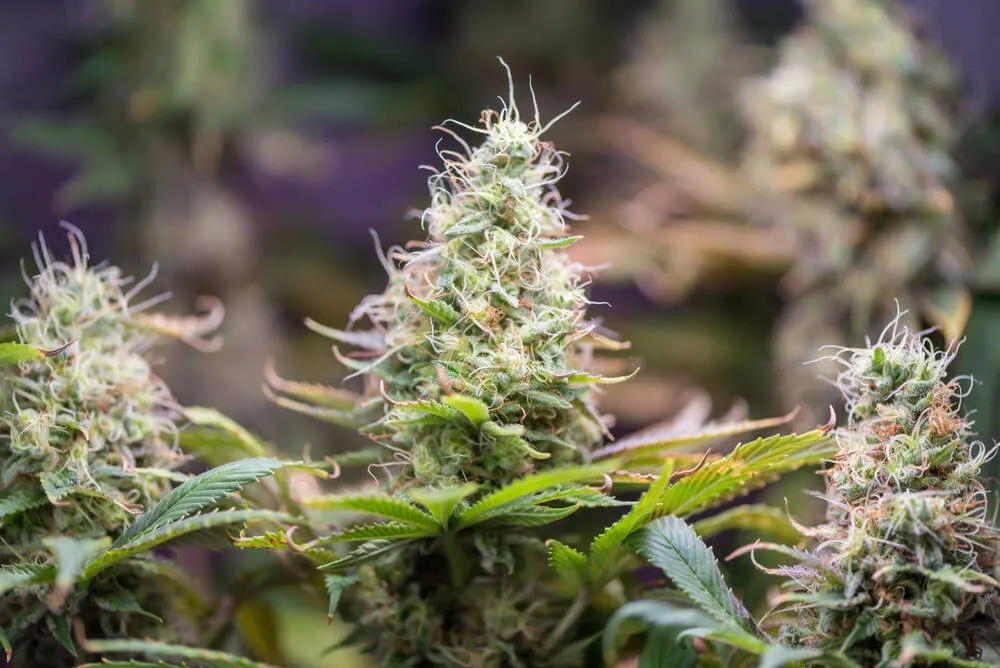
During Weeks 8 and 9, the autoflowering cannabis plant will be in the final stages of its flowering journey. The buds will be mature and ripe, and the plant may exhibit some changes in appearance as it approaches harvest time.
Major Developments
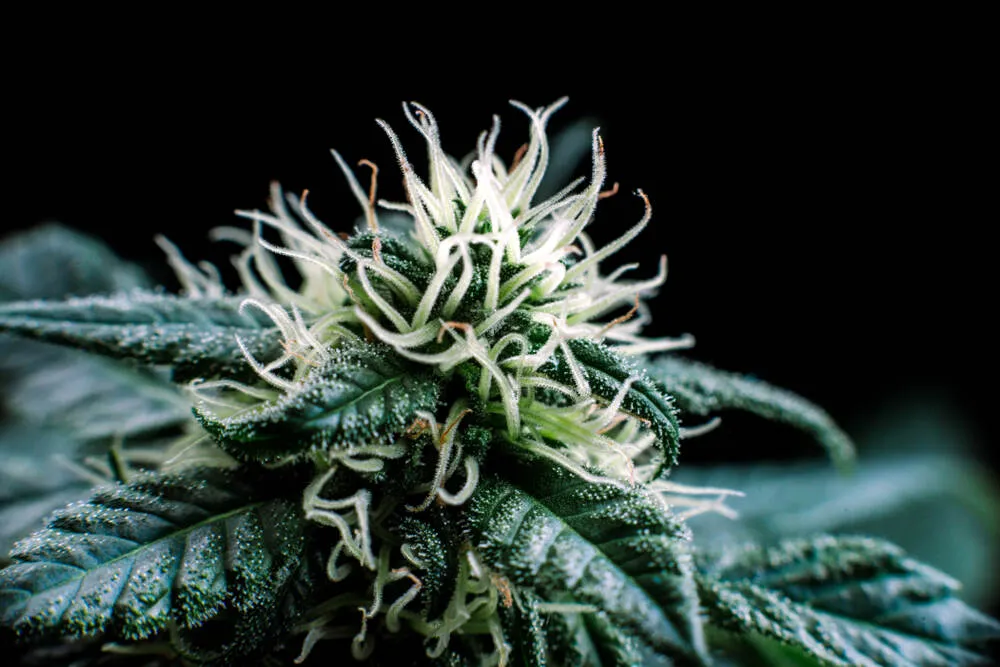
- Ripening of buds: The buds will continue to mature and reach their peak potency and flavor. The pistils may change color, and the trichomes will turn milky and cloudy, indicating the optimal time for harvest.
- Fading of leaves: Some lower leaves may start to yellow and fade, which is a natural process as the plant reabsorbs nutrients from older foliage to nourish the developing buds.
Caring For Your Plant
- Monitor trichome color: Regularly inspect the trichomes on the buds using a magnifying glass. Harvest when they are mostly cloudy with some amber trichomes for a balanced effect.
- Flushing: If using nutrients, consider flushing the plant with plain, pH-balanced water for the last week or two before harvest. This helps remove any residual nutrients and enhances the final flavor of the buds.
Watch out for
- Trichome degradation: Be cautious not to wait too long to harvest, as trichomes can start to degrade if left on the plant for too long. This may reduce the overall potency and quality of the final product.
- Environmental stress: Avoid any major environmental stressors, such as temperature fluctuations or excessive humidity, as they can negatively impact the final buds.
Nutrients
- No nutrients needed: During the late flowering stage, the plant generally does not require additional nutrients. If flushing, use plain, pH-balanced water.
Things not to do
- Do not rush the harvest, as premature harvesting can result in underdeveloped buds with lower potency.
- Avoid using harmful pesticides or chemicals close to harvest time, as they may leave residues on the buds.
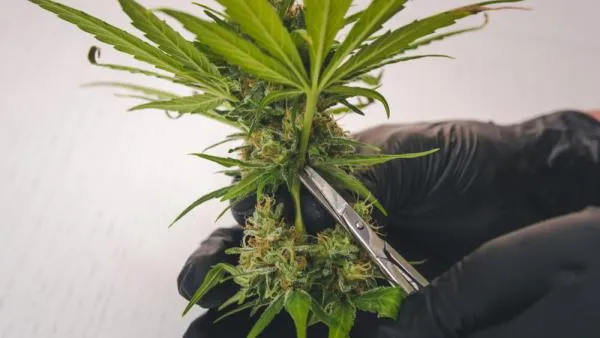
Harvesting
- Harvest when the trichomes are mostly cloudy with some amber ones for a more relaxing effect. If seeking a more energetic effect, harvest when the trichomes are mostly cloudy and clear.
- Use clean, sharp scissors to cut the branches, and trim away excess leaves while preserving the buds.
- Dry the harvested buds slowly in a dark, cool, and well-ventilated space to maintain their flavor and potency.
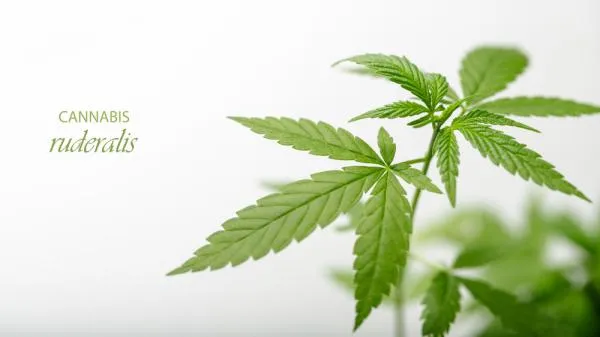
What makes autoflowers unique?
Autoflower seeds originate from Cannabis Ruderalis, this is a subspecies of cannabis that has been crossed with photoperiod Sativa and Indica genetics to create autoflowers. The Cannabis Ruderalis species is native to regions such as Siberia where it has naturally adapted to survive in the cold weather and short daylight hours. One of these adaptations is the ability to flower based on age rather than daylight hours. This is what gives autoflowering strains their ability to flower automatically.
FAQs
What is the best light cycle for autoflowers?
The best light cycle for autoflower cannabis seeds is 18/6 or 20/4, both of these cycles provide optimum light while giving the plant enough recovery time.
How long does an autoflower take to grow?
Autoflowers typically take around 8 to 12 weeks from germination to harvest, depending on the strain and growing conditions.
What does an autoflower look like when it starts to flower?
When an autoflower starts to flower, you'll notice the development of small, white pistils (hairs) at the nodes of the plant. These pistils will eventually turn into buds.
What week do Autoflowers start to stretch?
Autoflowers usually start to stretch and experience rapid vertical growth during the early flowering stage, typically around Weeks 2 to 3 of flowering.
What are the first signs of flowering?
The first signs of flowering in an autoflower are the appearance of small white pistils (hairs) at the nodes where the branches meet the main stem.
How long is an Autoflower in the seedling stage?
The seedling stage of an autoflower typically lasts for the first 2 to 3 weeks after germination. During this time, the plant will develop its initial set of leaves (cotyledons) and the first true leaves.
Conclusion
From germination to harvest, each stage demands care, patience, and attention to detail. Remember to adjust light cycles, use the right nutrients, and spot early flowering signs. Apply these insights to your next grow and you will be on track for a successful autoflower harvest.


4 Comments